Layout of Existing Prefabricated Building
The
“cartoons” that I produce may not be to scale and the accuracy of the content
is not guaranteed, but they can be produced very quickly – and really, really
cheaply so please just accept them. What should be the first one is missing
because, working from the bottom up, we would start with the foundations. All I
know is that for this type of structure we do not need a complete concrete
base, saving a considerable sum of money. Foundations are about a metre square
at each of the major support points. They are excavated down to red earth and
filled with appropriate concrete and steel (I think). I don’t yet have the
drawings for this (Stuart!) but can assume that a foundation is required at least
at the corner of every unit. Obviously where the units are joined a single
foundation will suffice. I don’t know if there are any at the mid-points. End
units (1, 3, 4 and 6) have 7 major supports above ground level. These are the
4” square steel uprights seen most clearly in this picture:
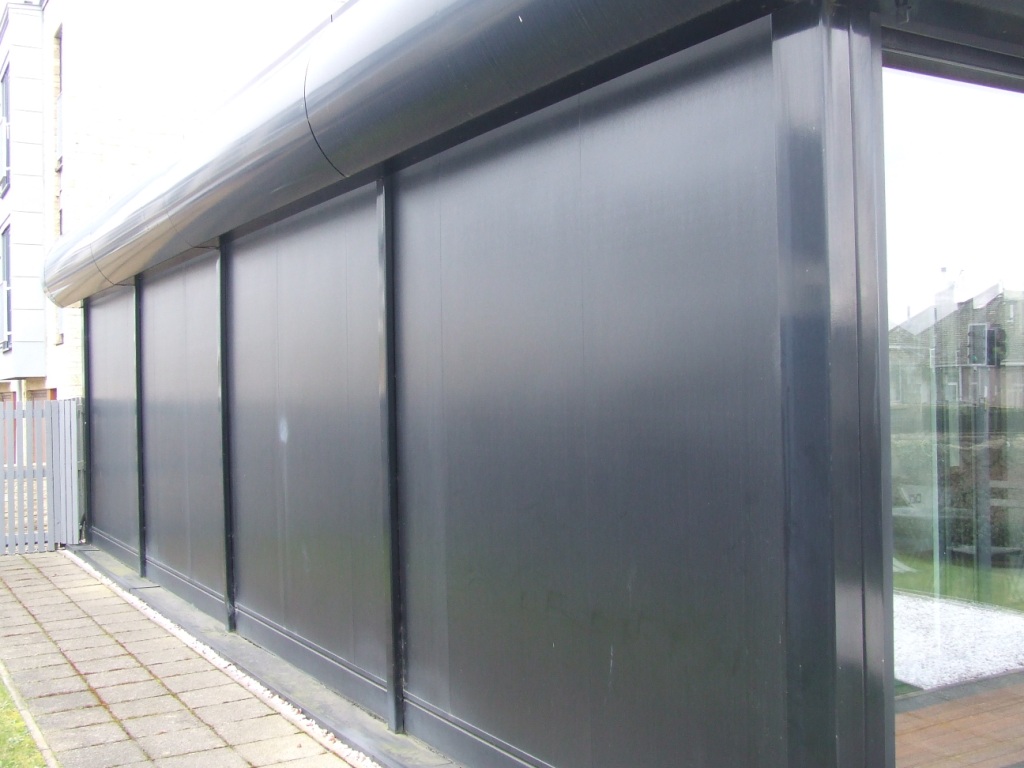
I
assume that what holds it all in place below ground level matches to these
points. Anyway, I think I was told that there were 28 foundations and that
would make sense as units 1, 3, 4 and 6 have 5 supports down one side and units
2 and 5 just have two at each end (joined to the next unit). That makes 28 in
total.
Anyway,
you will be updated very quickly after I get the proper information.
What
we can be more certain of is what goes on above ground level. This diagram
shows the external dimensions of each component part.
Each “end” of every unit is
about 11’. The sides are split into 4 sections of almost exactly 10’ each. This
diagram describes what feature there is on each external section.
Here is a rough schematic of
the current layout:
There is a lot of good stuff
in the show flat, but most of it is of little use to us – we need large
changing rooms with showers and toilets instead. The various different
floorings in particular will have to go because that side of the building will
be accessed by people wearing metal studs in the soles of their boots. I am
hoping that the flooring from the office side can be lifted and reused, as that
will be the side of the building where no studs are allowed.
The kitchen and toilets are
likely to be the best places for providing us with reusable fittings, but,
despite the fact that the ceilings will have to be cut into sections and all
the wiring will have to be stripped, the light fittings, air conditioning,
heating and the roller shutters will be huge gains for us, improving the
finished product and saving us a fortune.
Finally (for this page) I
have documented the external dimensions of the structure at roof level:

One of my next high priority
tasks is to ascertain if these units can be manoeuvred through the village (or
round the estate) to get them to their target destination.
If that proves to be
impossible then this project comes to an abrupt end. Height may be an issue in
getting past trees, lampposts and telephone wires. The units will be
transported on specially-designed flatbed trailers with very small wheels so
they are considerably lower than normal trucks of the same length. I will keep
you updated on my progress. If you see me running about the estate with some
long pieces of wood held above my head please don’t try to get me locked up. I
have a good reason for acting strangely.
|
Existing
Building |
Proposed
Structure |
Playing
Areas |
|
|
|
|||
|
|
|||
|
|
|
![Logo new 4 e-mail[1]](Existing_files/image019.jpg)